
To install Git on Windows, use the current installer from the official Git website or install the same package with Windows Package Manager. For most people, the recommended installer choices are the right starting point: make Git available from the command line, keep the bundled OpenSSH client, choose an editor you already use, and let Git Credential Manager handle sign-in when it is offered.
This guide covers Windows 11 and supported 64-bit Windows systems. The installer changes over time, so button names may differ slightly from the older screenshots retained later in this article.
Install Git on Windows: two supported methods
Method 1: install Git with winget
If Windows Package Manager is available, open PowerShell or Windows Terminal and run:
winget install --id Git.Git -e --source wingetClose and reopen the terminal after installation, then confirm Git is available:
git --versionThe official Git download page publishes this winget command and always links to the current maintained build.
Method 2: use the Git for Windows setup wizard
- Open the official Git for Windows download page.
- Download the x64 setup program for a typical Intel or AMD Windows computer. The page also lists ARM64 and portable packages when those are a better fit.
- Run the downloaded setup program. Approve the Windows security prompt only after checking that the installer came from the official Git site.
- Leave the destination folder and core components at their defaults unless your organization has a defined standard.
- Choose a default text editor. Visual Studio Code is a practical choice when it is already installed. Otherwise, select an editor you know how to exit and use from the command line.
- Set the initial branch name to
mainif you want new repositories to follow the convention used by many current hosting services. Existing repositories keep their own branch names. - For PATH, choose the option that makes Git available from Git Bash, Command Prompt, PowerShell, and third-party applications. This is the most useful setting for most workstations.
- Keep the bundled OpenSSH client unless your employer has a managed SSH configuration.
- Keep the recommended HTTPS, terminal, credential-helper, and file-system options unless your team documents a different requirement.
- For line endings, follow your repository’s
.gitattributesfile when one exists. The installer default is a sensible starting point for most Windows users. - Complete the installation and launch Git Bash or a new Windows Terminal session.
Which installer choices matter most?
Default editor
Git opens an editor for commit messages and some merge operations. Pick Visual Studio Code, Notepad, Vim, or another editor you can use confidently. You can change the choice later with git config --global core.editor.
Initial branch name
Git supports setting the default branch created by git init. To use main, run:
git config --global init.defaultBranch mainPATH integration
Allowing Git on the Windows PATH means the git command works in PowerShell, Command Prompt, Windows Terminal, and development tools. If your organization manages PATH centrally, use its documented setting instead.
SSH and credentials
The bundled OpenSSH client is the simplest choice for most users. Git Credential Manager, when offered by the installer, supports modern browser-based sign-in with common repository hosts. Your Git commit name and email are separate from authentication credentials.
Line endings
Windows and Linux use different line-ending conventions. A repository-level .gitattributes file is the best source of truth because it gives every contributor the same behavior. If no policy exists, keep the installer recommendation and adjust it only when the project requires it.
Legacy visual walkthrough
The screenshots below show Git 2.28.0 on Windows Server 2019. They remain useful for understanding the wizard sequence, but use the current installer from the official Git site and expect some labels and defaults to have changed.

Select your OS – in my quick example I’ll be deploying on a windows 2019 server

Normally auto-downloads the package you need but you can select the option you need

Go to wherever your downloadable files are stored and double click the Git-2.28.0-64-bit file

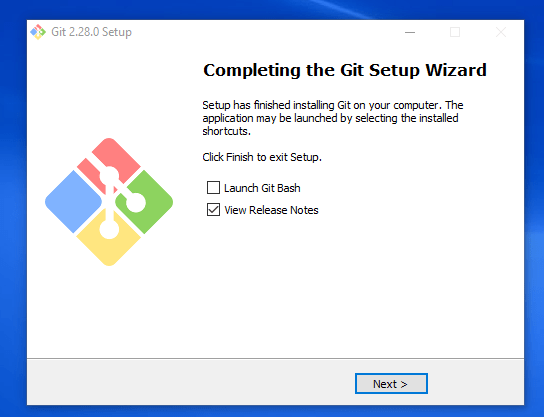
Let’s ride the wizard – you have the option to customize but if you are a beginner the defaults will serve you well in the beginning


Vim is the default text editor for Git but if you use Visual Studio Code like me then you will want to switch over to it



If you launch the git console it should look something like this
Verify Git and complete first-time setup
Open Git Bash, PowerShell, or Windows Terminal and run:
git --versionThen set the identity that Git records in new commits. Use your own name and the email address appropriate for your repository host or employer:
git config --global user.name "Your Name"
git config --global user.email "you@example.com"
git config --global init.defaultBranch main
git config --global --list --show-origin
The --global settings apply to your Windows user account. A repository can override them with local settings when work and personal identities need to remain separate.
Create a harmless test repository to confirm the basic workflow:
mkdir git-install-test
cd git-install-test
git init
git status
You can delete the empty test folder after validation.
Troubleshooting Git on Windows
git is not recognized
Close every terminal window and open a new one so Windows reloads PATH. If the command still fails, run where.exe git in Command Prompt or Get-Command git in PowerShell. Re-run the installer and select command-line PATH integration if no Git executable is found.
The wrong Git installation runs
Use where.exe git or Get-Command git -All to find multiple installations. Put the managed or current installation first on PATH rather than deleting files blindly.
Git opens an unfamiliar editor
Choose an editor during setup or change it later. For Visual Studio Code, the common command is:
git config --global core.editor "code --wait"Git is installed but out of date
Git for Windows includes an update command:
git update-git-for-windowsYou can also download the current installer from the official site; normal user configuration is retained during an upgrade.
1 thought on “How to Install Git for Windows: Step-by-Step Guide”